Creating media page / adding a video to Moniviestin
Procedure in Moniviestin
In Moniviestin the content is organized in folders and subfolders. Adding videos begins with creating a program in the desired folder. This program can be named e.g. according to the course name. For each lecture in the course, a media page will be created inside the program. This media page consists of the actual video material. You can add as many media pages as you need to the same program.
A path towards the media page could be like this:
- Main folder: Name of the faculty
- Sub folder: Name of the discipline or institute
- Program: Name of the course
- Media page: Name of the lecture
Adding a program page
Browse to the folder which you have edit access to.
Click the green edit bar: "Lisää uusi..." (Add new) and pick "Ohjelma/Program" from the drop menu.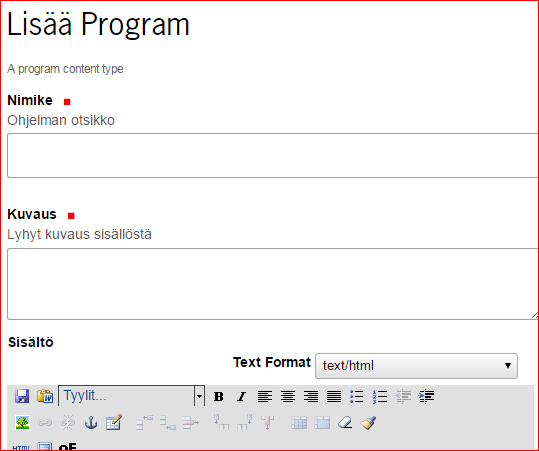
Write at least a name (NIMIKE) and a description (KUVAUS) - typically a course name and a short description of it's content/subject. Save your changes by clicking "SAVE/TALLENNA" at the bottom of the page.
Adding a media page
After you have added a Program, please follow these steps:
Choose Add new... --> Media page (Lisää uusi... --> Mediasivu)
Alternatively you can click the green Lisää mediasivu (Add media page) -button.

Fill in name (nimike), description (kuvaus) and some content text (runkoteksti). These can be changed later.
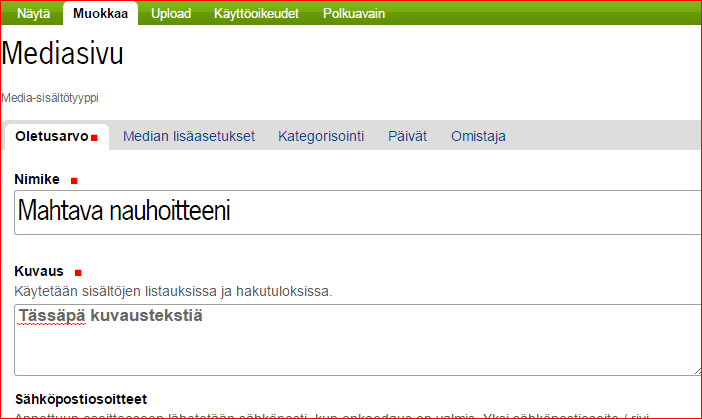
Click Save.
After saving you will see the upload page. You can choose a video file from your own computer (.avi, .wmv, .mp4 or .mpeg for example) by clicking Choose file.
If you wish to trim your video after the upload, click the checkbox: "Haluan tehdä videolle rajauksen... (I wish to trim the video...)"
Select the file you want to upload from your computer and then click: Send (Lähetä)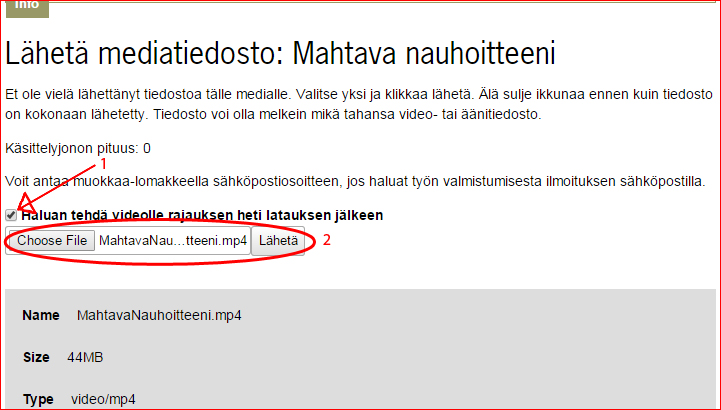
- Allowed file name extensions are: avi, mp4, mpeg, ogv, rm, mov, wmv, mpg, flv, mkv, mts, 3gg2, 3gp, asf, asx, divx, xvid, ts, vob, hdmov, m2p, m2t, m4v, ogm, mp3, mpa, aac, wav, ogg, wma, aa3, aif, at3, flac, m4a and ra (NB! Allowed file extension does not guarantee that the codec of the video can be encoded.)
- Uploading will take time and it is dependent of the speed of your internet connection. Please wait and do not close the browser window.
- After you have clicked "Lähetä" and video upload is completed, you will be redirected to encoding progress page.
- If you chose the TRIM function, the video will be encoded in preview quality. After this processing you can choose the cropping marks (see "Trim function" below). If the trim function was not selected, the video can be published after this encoding.
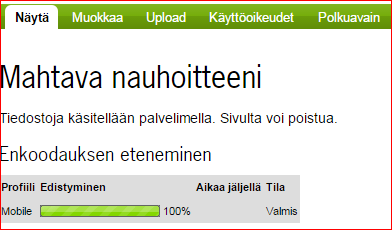
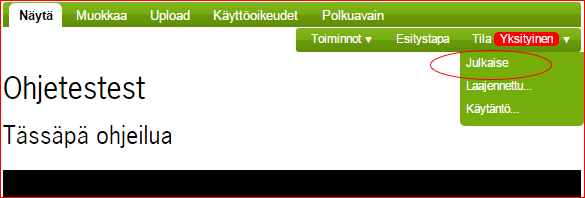
The media page (Mediasivu), like any other content in Moniviestin (excluding pictures) is private as a default. To publish the video, click: Tila (Status) --> Julkaise (Publish). Now your content is published.
Trim function
When uploading a new video, click the checkbox: "Haluan tehdä videolle rajauksen... (I wish to trim the video...)" before sending the video file.
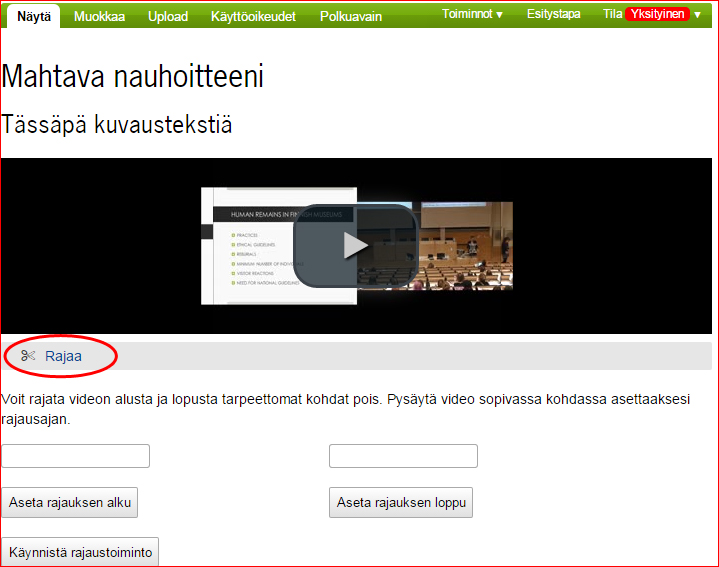
After uploading the video with the trim function enabled you will see your video in preview quality. If you don't see video at all, please wait a moment for the video processing to finish and reload the page. If the trimming options are not visible, click Rajaa (Trim). The trim controls will now show below the video screen:
Please note, that you need to trim at least one second from the start and the end of the video, otherwise the trim function will not work.
Now you can choose the start and end points to your video:
- Pause the video on the desired starting point and click Aseta rajauksen alku (Set the starting point).
- Then pause the video on the ending point and click: Aseta rajauksen loppu (Set the ending point).
- When you are ready click Käynnistä rajaustoiminto (Execute the trim).
The browser will take you back to the encoding progress page. You can leave the page if you want. When the trimming has completed, you can watch your video in full quality at Näytä (Show) tab. Remember to test that your video works!
The media page (Mediasivu), like any other content in Moniviestin (excluding pictures) is private as a default. To publish the video, click: Tila (Status) --> Julkaise (Publish). Now your content is published.
Viewing permissions
Published content is visible to everyone by default and can also be found with Google and similar search engines later on. Private content is only shown for defined and logged in users.
- From the Permissions tab you can give viewing and editing permissions to users who have logged in with their HAKA or JYU account. Permissions can also be given for private content.
- From Path key tab you can protect the content with a path key, a simple password. Content protected with a path key is usually in a published state and user needs to type correct path key to be able to view the content.
Adding attachments to a media page
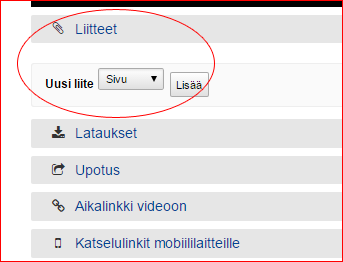
Pages (sivu), pictures (kuva), files (tiedosto) and links (linkki) can be added to a media page under the video.
Setting new preview picture for a video
Video preview picture can be changed:
- Edit media page (Muokkaa)
- Choose new preview picture for a video by clicking "Valitse tiedosto" or "Choose File"
- Click Save

